Joystick Curve
The Problem
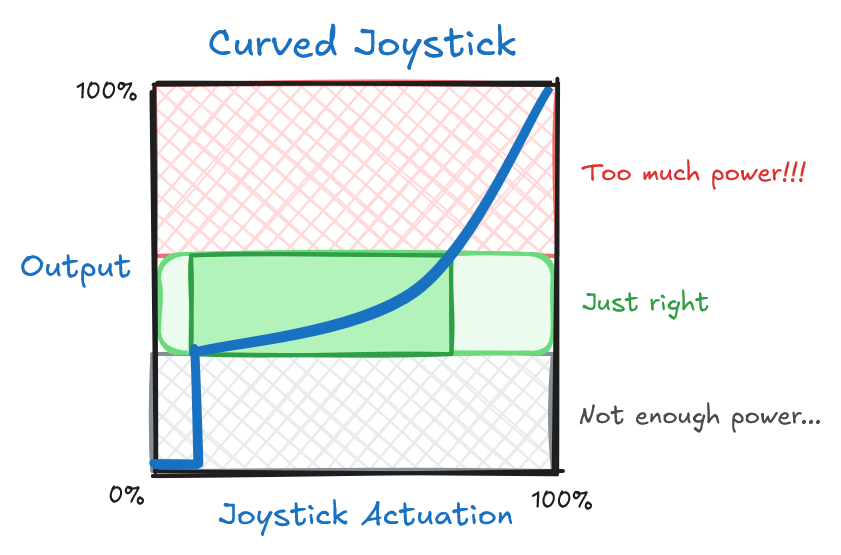
Typically, driving a robot with a pair of joysticks is a breeze. However - Depending on drivetrain speed and the driver's experience level, it can be difficult to make fine adjustments during the heat of competition. This is in large part due to how little area there is on the joystick to make these small adjustments.


Too much input and the robot will overshoot. Too little and the motors won't be able to overcome the friction of their own gears. Its extremely difficult for a driver to get in that perfect goldilocks area.
Introduce: Joystick Curving
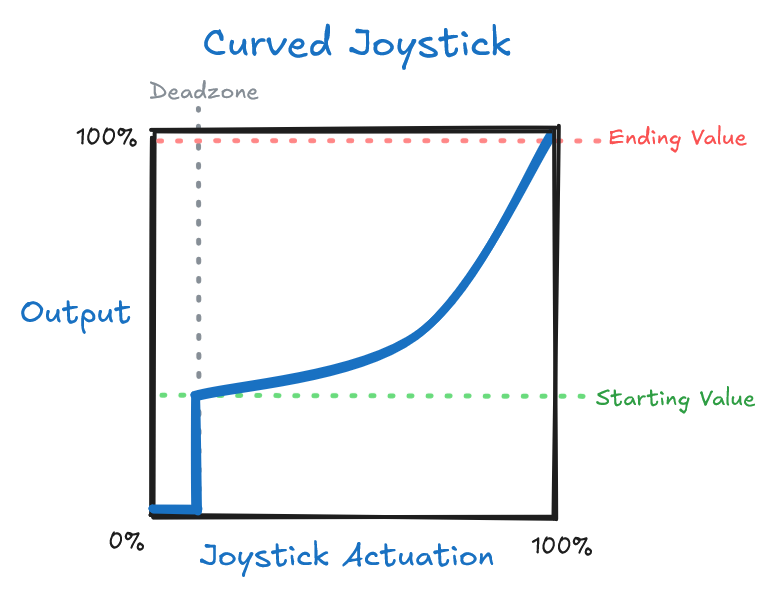
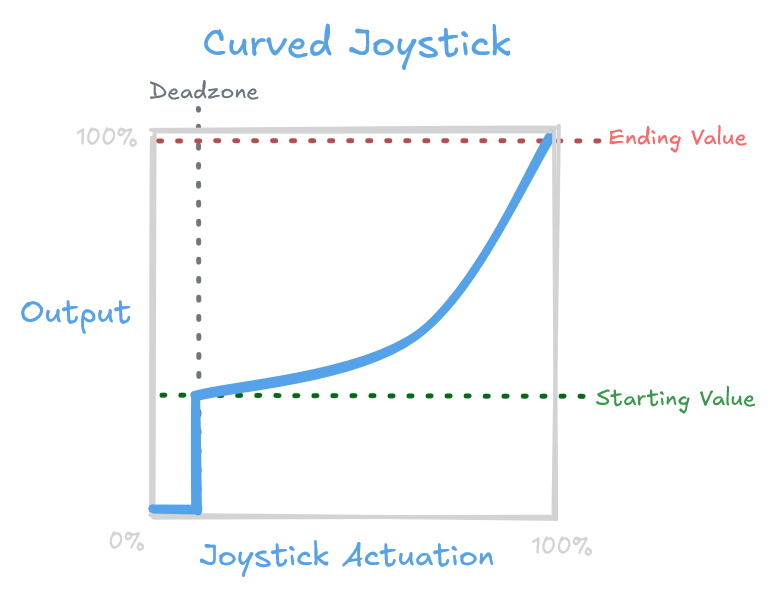
Adding a curve to the joystick mitigates this problem by dedicating a larger movement area of the joystick towards these fine adjustments.

This allows the driver to quickly make small movements while still enabling the ability to use the full motor power when needed.
Example
By default, each controller axis is linear.
In DevilLib, you can apply a joystick curve to each axis by creating a ControllerAxis::Options,
and applying it to each joystick axis you would like curved.
class MyRobot : Robot
{
    /// @brief Ran during initialization
    MyRobot() {
        // Create the joystick curve options
        constexpr ControllerAxis::Options joystickOptions = {
            .deadzone = 0.1f,       // <-- Deadzone - Ignores input until the joystick reaches 10% input
            .startingValue = 0.15f, // <-- Minimum output - Jumps to 15% output to overcome motor friction
            .endingValue = 1.0f,    // <-- Maximum output - Usually just keep this at 1
            .exponent = 3.0f        // <-- Exponent - Smaller values (0 - 1) will curve upwards
                                    //                Larger values (1 - *) will curve downwards
        };

        // Apply these options to each joystick axis
        mainController.leftX.setOptions(joystickOptions);   // <-- Left X Axis
        mainController.rightY.setOptions(joystickOptions);   // <-- Right Y Axis
        // ...
    }

    // ...
}
Parameters
| Parameter | Description |
|---|---|
| Deadzone | This is the smallest possible input the joystick can produce. Try to keep this as small as possible. |
| Starting Value | This is the amount of power that the joystick will produce initially. This should be just barely enough to see the motors move. |
| Ending Value | This is the maximum amount of power that the joysticks will output. For example, this can be set to 50% for the steering for more fine control. Otherwise, this can be kept at 100%. |
| Exponent | This is the amount of curve the line has. A value of 1 is linear, a value between 0 and 1 will curve the line upward, and a value greater than 1 will curve the line downward. |